BUD'S overview
of lost wax casting.
BUD'S overview
of lost wax casting.
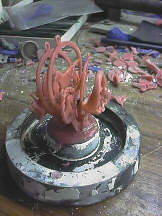 |
The process begins with the creation of a wax model of the piece that
you are going to cast. This is normally hand carved but can also
be actually purchased from suppliers. Once the wax model is ready,
a "tree" is formed in a flask base to prepare for the investment and casting.
Multiple wax molds can be included in a single casting, based on the equipment
that you have to use. The entire group must be weighed so that you
can judge the amount of metal to melt during the actual casting step.
Too little metal and you will have incomplete casts, too much and you will
find hot metal being thrown all over your shop. This is ONE example
of how a wax setup can be put together. This example uses
a small 2 1/2 inch flask that holds about one ounce of metal per cast. This is a good size for beginning casters. |
 |
After your "tree" is created, the wax is usually rinsed with a "debubbler"
(that reduces the surface tension and bubbles during the casting) and the
metal flask is pushed onto the base. The next step is to mix and
add the investment
(plaster-like material) into the flask. |
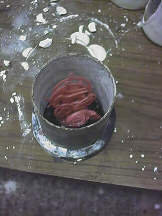
| The investment is mixed with water to a "cake like consistency".
Actually this is a critical step. The investment has to have the
proper water to powder ratio since a mix that is too thin or too thick
will ruin the final casting. Another problem is the air that is trapped
in the mixture. These air bubbles will actually cast as "globs or
drops" of metal on your casting, so they must be removed. Typical
instuctions tell you to weigh the powder,
measure the water, and add the powder to the water. I confess that I've been casting long enough that I just through a bunch of powder into my rubber mixing bowl, add water slowly, while mixing with a FORK. Once I get the consistency that I like, I take an electric mixer and slowly mix for another couple of minutes till it's perfectly smooth. I tend to opt to a "loose" mix rather than thick. The next step is to vacumn the mixture. |
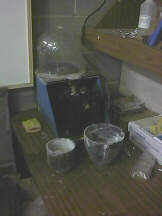 |
This is the vacumn machine that I use to remove those "pesky" air bubbles in the investment, prior to casting. The machine has a "dome" in which the pump creates a vacumn atmosphere that "boils" the air from the investment. | 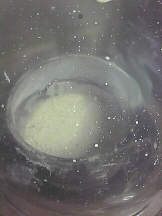 |
This is a snapshot, taken through the vacumn machine dome, while the
investment is being "boiled". You can actually see the bubbles coming
to the surface and leaving the mix.
This is ALL vacumn, no heat. |
| Pouring the flask is also an important step. I pour the investment
down the side of the flask (such as when drawing a beer to eliminate foam).
The goal here is to eliminate "catching" an air bubble under a part of
the wax mold. If you have a "vibrating table", it's a good idea to
vibrate the flask, while pouring. I simply tap on the side of the
steel flask as I pour to eliminate bubbles. It works for me.
:-) Some casters will return the poured flask to the vacumn machine
and vacumn the bubbles that might have been created. I don't like
to disturb the freshly poured flask that much, so I do
not revacumn it. I DO overpour, so that a little is actually above the lip and the bottom is slightly rounded. You can use rubber "collars" to insure that you have enough material behind the wax models to insure that it does not "blow out", during the casting of the hot metal. This is a judgement call based on the height of the wax models inside the flask. |
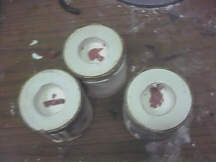 |
The investment usually takes about an hour or two to properly set up,
so that you can remove the base. Here is
a picture of three poured flasks with the bases removed. The red wax sprue bottom can be seen. I confess that I once again have my own preferences to letting the flask set up. I leave them overnight before I cast them. |
 |
The next step is the "burnout" and actual casting of the flask.
Burnout is the term used to describe the elimination
of the wax model from the flask. The goal is to melt the wax inside the flask, leaving the void that it once filled, for the metal to be casted. The wax filled flasks can be heated in a burnout oven, or steamed to remove the wax. I use a burnout oven as seen in this picture. The picture shows about five flasks, somewhere in the middle of a burnout cycle. The cycle (or times at certain temperatures) is important to getting a castable flask. Generally, the first stage is to harden the investment, slowly (like you might if you were making ceramics) and begin the melting of the wax. The next stages, with more heat, get the material to the correct hardness and temperature, and remove the minute traces of the wax for the tiny crevices of the model. All in all, it takes a minimum of about six hours for a proper burnout cycle. It will depend on the number and sizes of the flasks in the oven. I run them to about 1300 degrees and when I can NOT see a trace of black in the mouth of the flask, I let them cool back down to around 900 degrees to be ready for the actual casting. This depends on the type of metal that I am about to cast into the flask. |